These Hot Cocoa Bombs are such a fun gift to give or just make them and enjoy them yourselves! I am sure you’ve seen these hot cocoa bombs before but I couldn’t resist learning how to make these and put my own healthy twist on them.
And trust me, you won’t miss the other ones that are full of lots of ingredients that no one can even pronounce.
So, what did I do differently?
First, I started out by using dairy-free chocolate. Enjoy Life Chocolate Chips are dairy-free, nut-free, and soy-free! When you look at the ingredient list – there are just four ingredients and you can pronounce them all ;)!
Secondly, instead of using a pre-made hot cocoa mix, I made my own using 100% cacao powder which is SUPER healthy! Cacao powder has more antioxidants than blueberries (yep, 40 times more!) and is high in iron, magnesium, and calcium.
But I didn’t stop there – I also added a scoop of collagen powder just to add some protein. And voilá, you have a healthier hot cocoa bomb!
You can even take this one step further and make your own chocolate and marshmallows. Homemade chocolate and homemade marshmallows are SO much better than the kind you buy at the grocery store and worth the effort.
I get it though, not everyone wants to make this from scratch so I wrote this recipe using already made chocolate and marshmallows and it’s delicious. Enjoy making these – they are a lot of fun and Ah-MAZING to sip on especially as the weather gets colder!


Hot Cocoa Bombs, Homemade Healthier and Oh-so Delicious!
- Cook Time: 30-35 minutes
- Total Time: 0 hours
- Yield: 3 Hot Cocoa Bombs 1x
Description
Homemade Hot Cocoa Bombs that are healthier? Is this a thing? YES!! These Hot Cocoa Bombs are healthier and delicious!
Ingredients
Hot Cocoa Bombs:
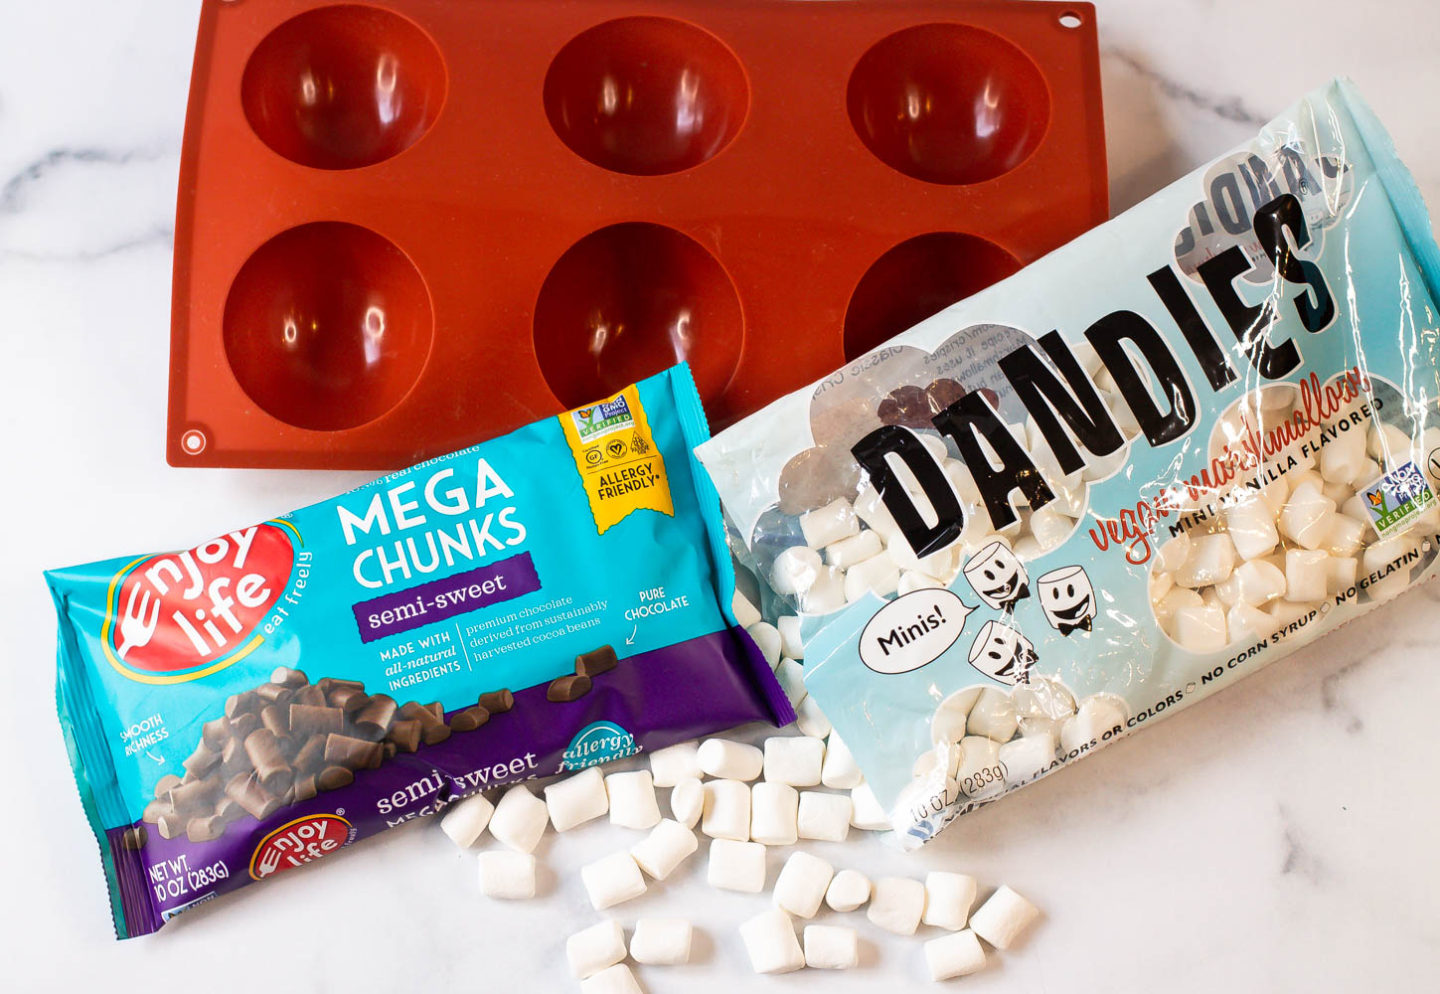
6 Tablespoons of quality semi-sweet or dark chocolate, I used Enjoy Life dairy-free chocolate chips
3 Tablespoons mini marshmallows, I used a vegan brand called, Dandies or you can make your own and cut them very small
3 scoops of collagen powder (optional but very nutritious)
3–6 Tablespoons Hot Cocoa Mix, recipe below (1–2 Tablespoons for each bomb)
8 ounces of nut milk for each Hot Cocoa Bomb
White chocolate to decorate (optional)
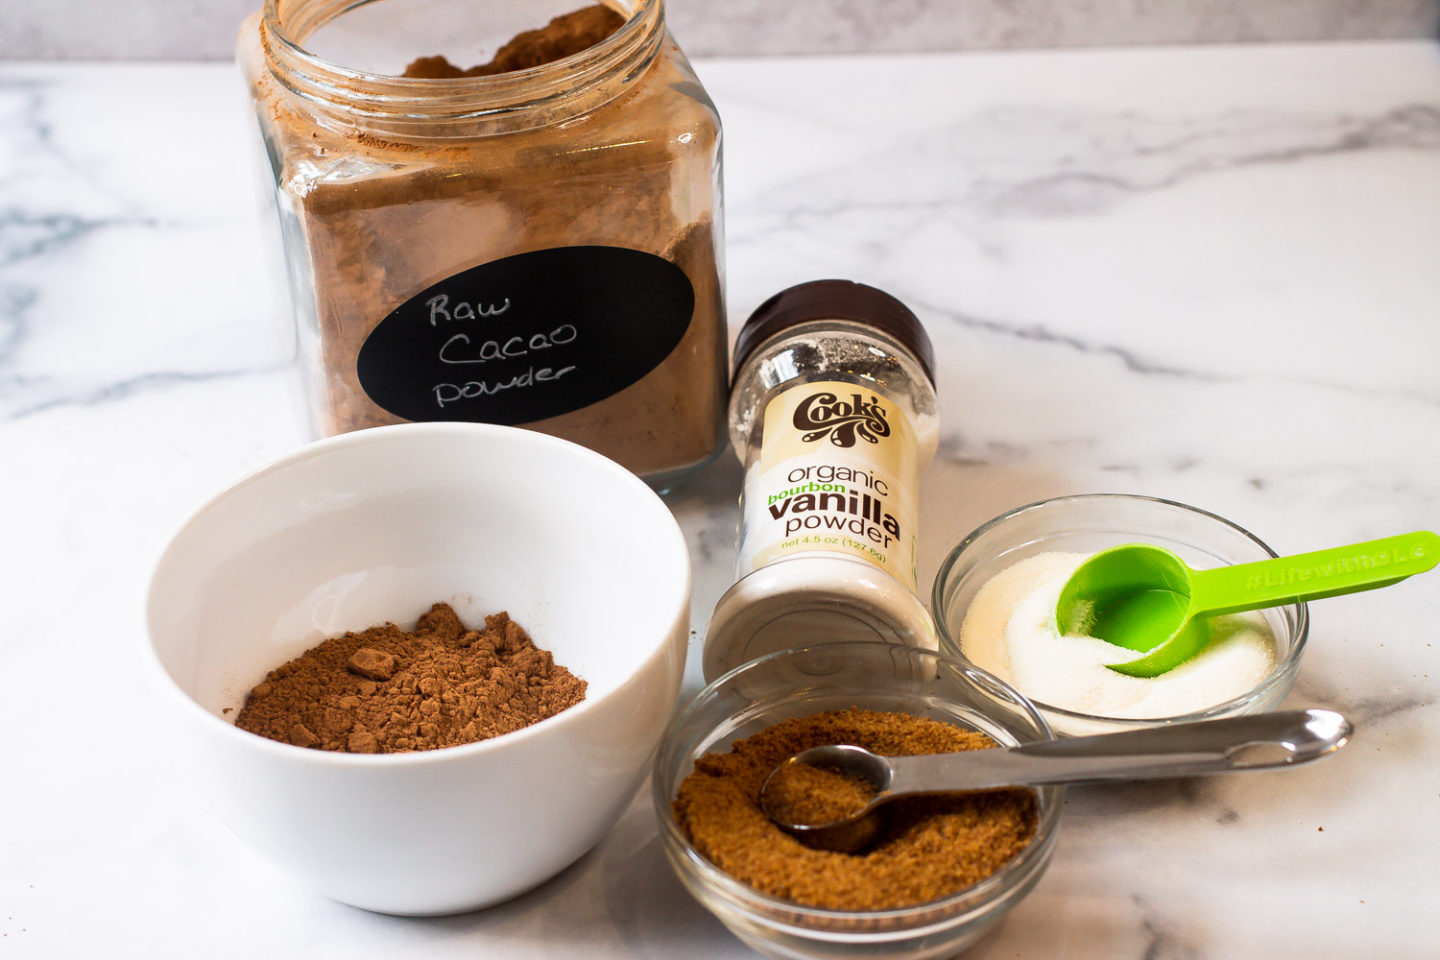
Healthy Hot Cocoa Mix:
6 Tablespoons organic cacao powder*
4 Tablespoons organic coconut sugar
1 Tablespoon vanilla bean powder**
You will also need a silicone mold, I found mine on Amazon.
Instructions
1.) In a microwavable bowl add the chocolate chips or chocolate chopped small and heat it for about 30 seconds. Take it out and give it a stir. It will not look like it’s even melted but you still need to stir it.
2.) Put it back into the microwave and heat in 15-30 seconds intervals, stirring in between each time until the chocolate is completely melted. Avoid overheating chocolate and make sure not to get any water in the chocolate mixture. This will cause it to seize up and you will need to throw it out and start all over again.
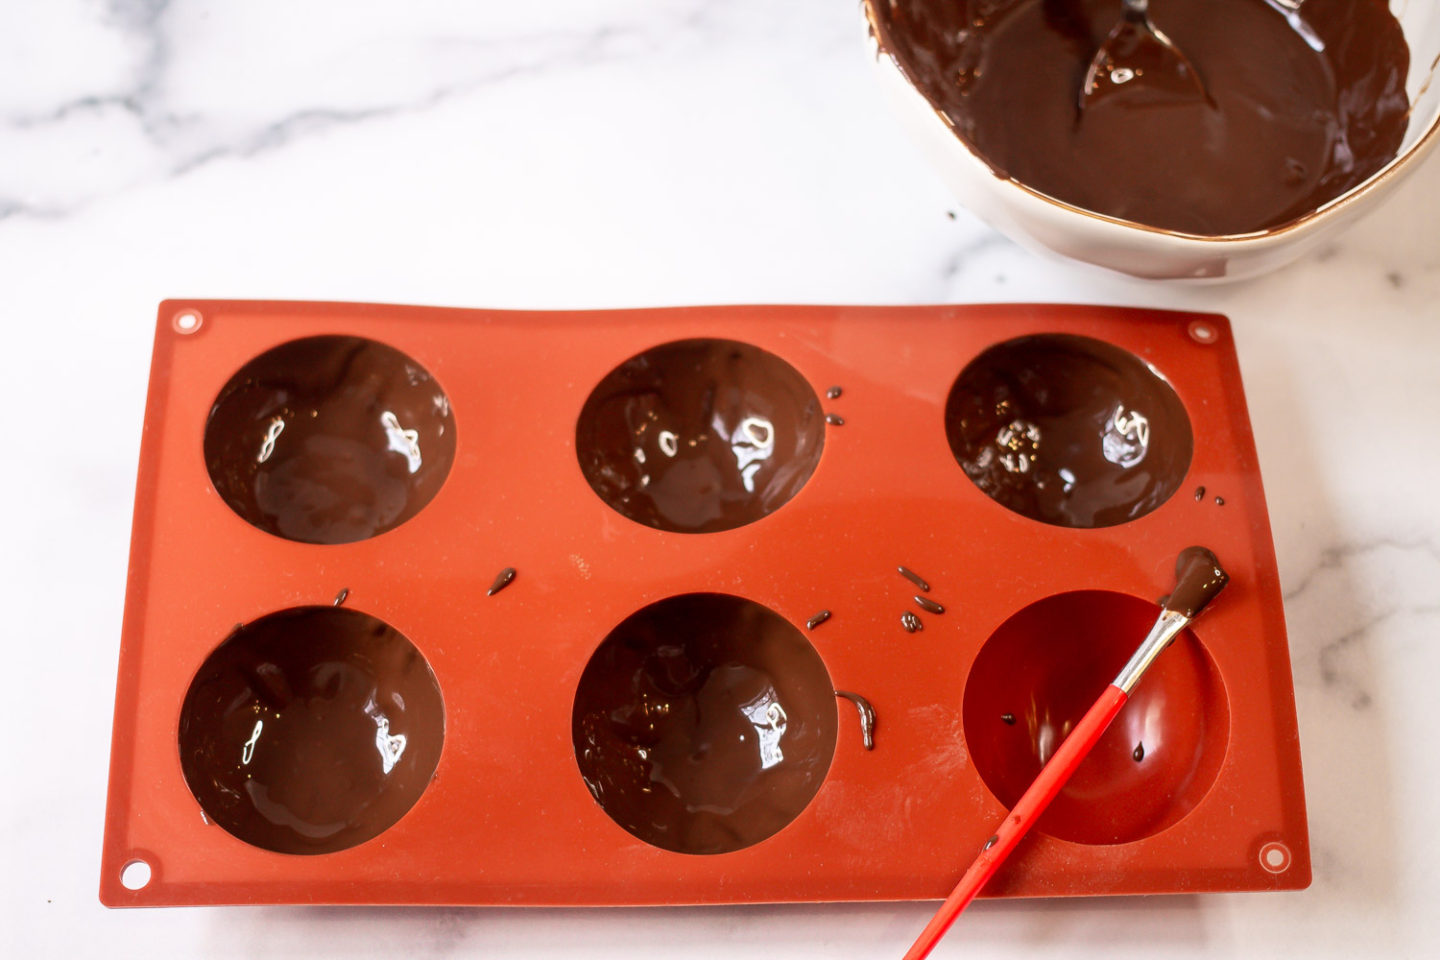
3.) Carefully put 1-2 tablespoons of melted chocolate into each hole of the silicone mold. Using the back of a spoon or a clean small paintbrush, and move the chocolate all around the mold so each hole is completely covered. You want to make sure the chocolate is thick enough to hold up when you remove it from the molds. Once you have covered all the holes with chocolate, place the mold in the refrigerator for 30 minutes to harden and set.
4.) While the chocolate is setting, make the cocoa mix. Start with adding all the ingredients into a small bowl and whisk to remove any lumps and to incorporate well.
5.) After the chocolate has hardened, carefully remove the chocolate from the mold and set aside. It is very likely that the edges of the sphere of chocolate are uneven. To fix this, heat a skillet on the stove. Once it’s hot, remove it from the heat and bring it over to the area where the chocolate is. DON’T GET THE PAN TOO CLOSE TO THE CHOCOLATE – trust me on this one;)!
6.) Carefully turn the chocolate over and heat the edges on the hot pan to smooth out any uneven parts. This should only take a second with each sphere as the chocolate will melt quickly.
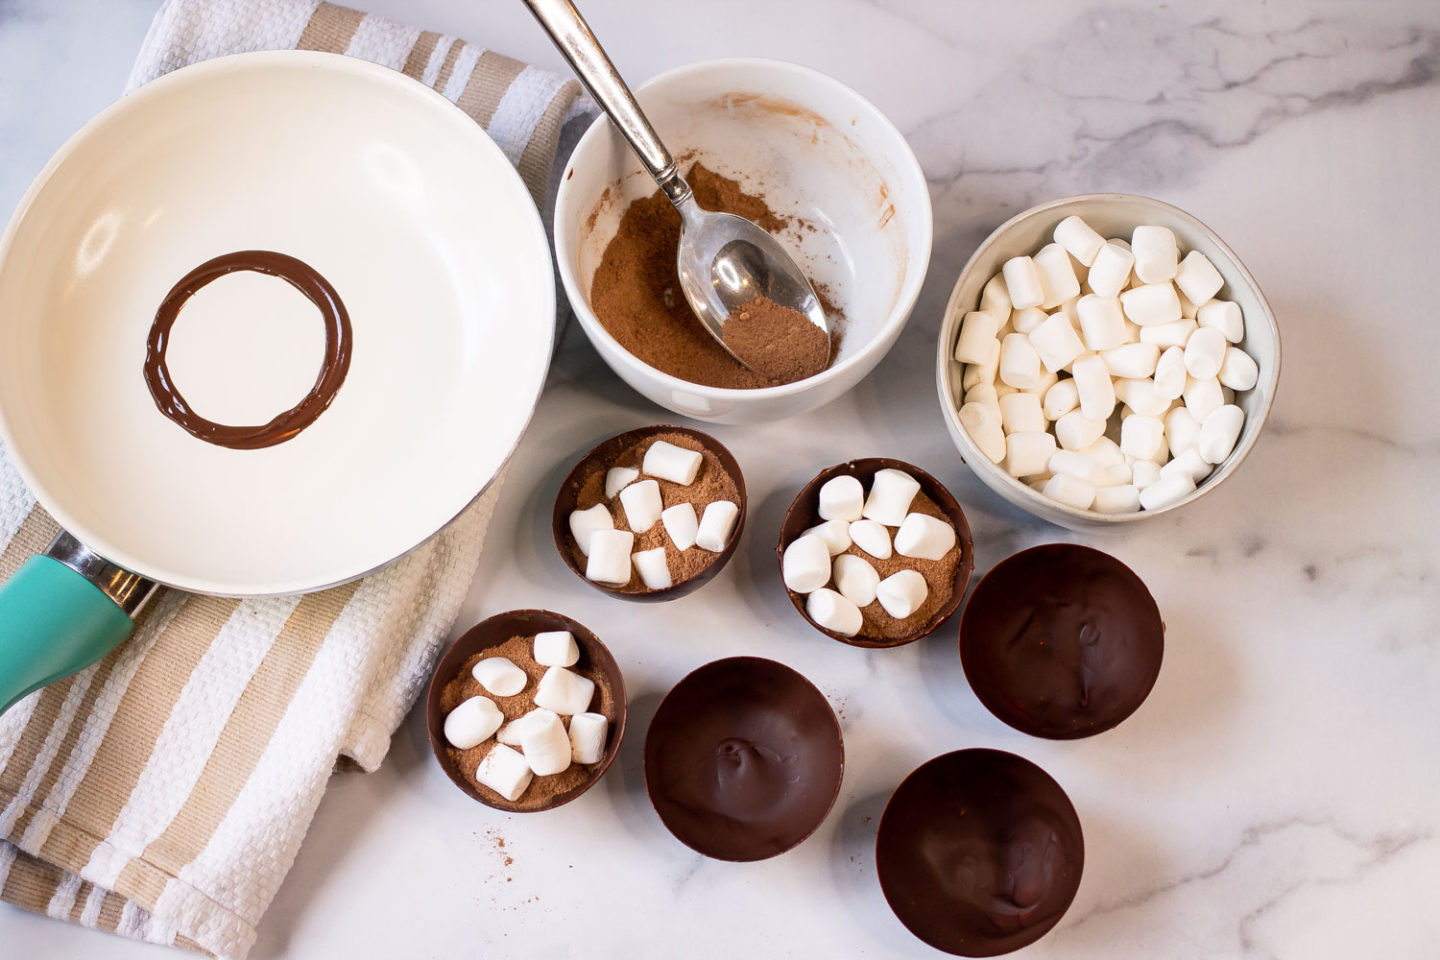
7.) Once your chocolate edges are even, fill 3 of the halves with 1-2 Tablespoons of hot cocoa mix and several mini marshmallows.
8.) If the edges of your chocolate are still warm and melted, you can bring the filled chocolate sphere together with the empty one. Press gently to seal them together. If your chocolate has hardened, you can reheat one side very quickly and gently press them together or you can melt some more chocolate and paint the edges and gently press them together.
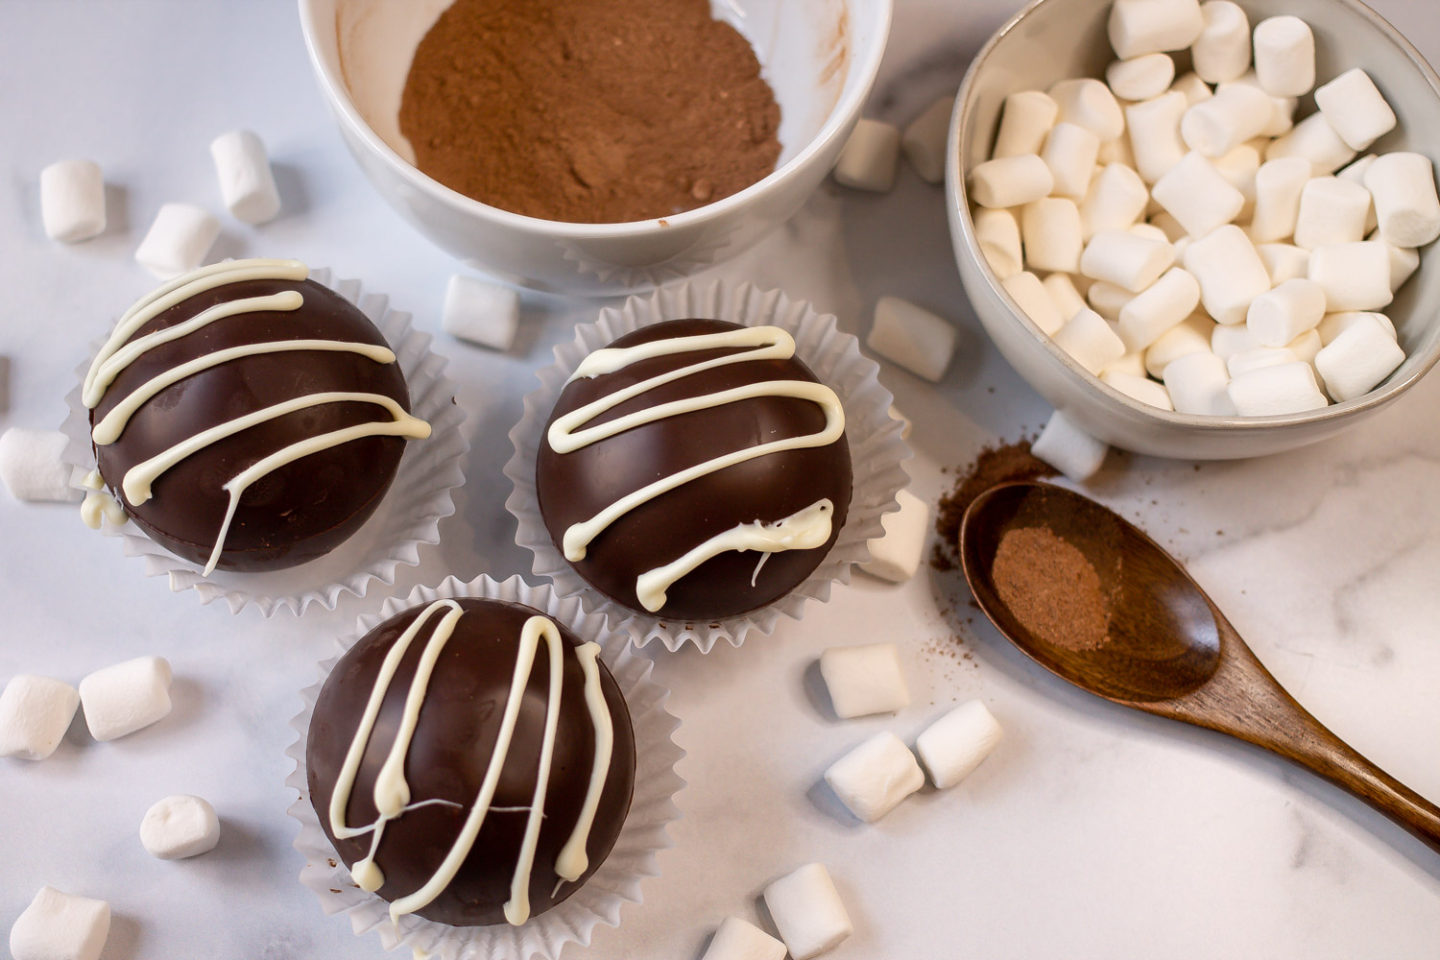
9.) If it looks a little messy, just take your clean finger and smooth out the seam while the chocolate is still warm. Set the filled hot cocoa bombs in a cupcake liner while they harden. Feel free to decorate with a little melted white chocolate as I have done here (see photographs) or any way you like! Once they have hardened you can wrap them and give them as a gift. Just include a tag to “Heat 8 ounces of your favorite milk, drop the bomb in the mug, stir and enjoy!”
10.) If you are making these for yourself, heat 8 ounces of milk on the stove just until there are bubbles around the side of the saucepan.***
Notes
*You can use regular unsweetened cocoa powder but you will lose some of the nutritional value. Cacao powder has a lot more nutrients in it and tastes delicious. It is more bitter than regular cocoa powder so you might want to think about that if you are making these for someone else.
**If you cannot find vanilla bean powder, you can add 1/2 of a teaspoon into the milk after it’s heated up.
***This should be hot enough to melt the chocolate but not so hot that it will burn your tongue. Be careful not to heat the milk too hot that it does burn your tongue – that is miserable – trust me on that too;)!

