You may be asking yourself, why bother making homemade protein bars when there are so many on the market. But have you ever noticed the ingredient list on the back? Most have an ingredient list that is as long as our arms and we will be honest, we can’t even pronounce some of the ingredients! Since we don’t want to eat something that doesn’t sound like real food, we thought you might be feeling the same way so we created these delicious low sugar homemade protein bars.
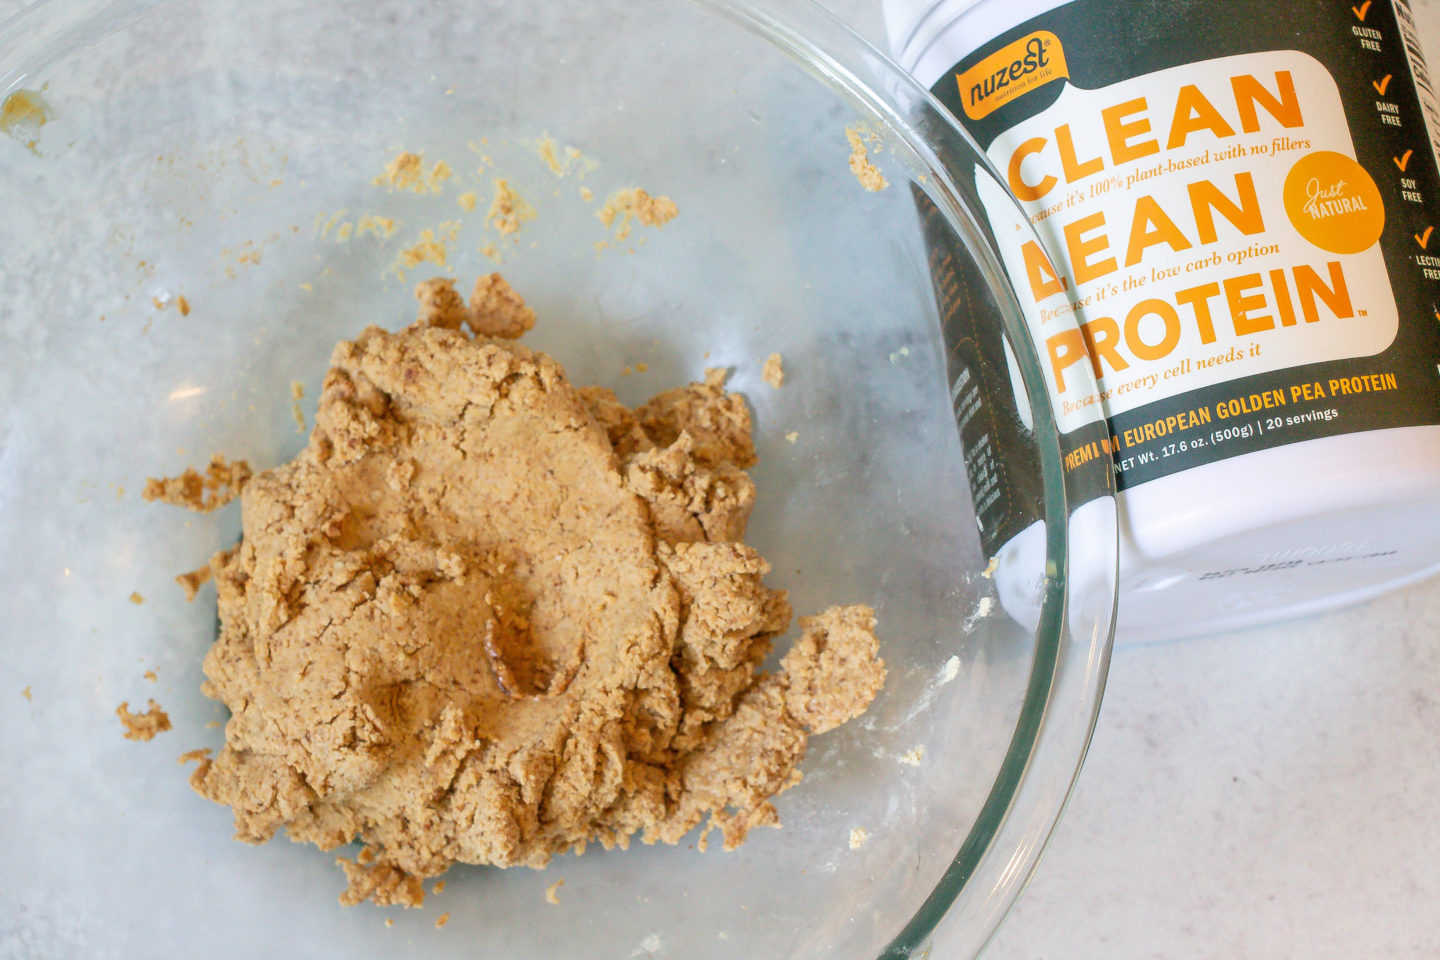
One thing that is important to notice is that these homemade protein bars are made with a protein powder that has only one ingredient listed, Pea Protein! That is almost unheard of even with other trusted brand protein powders. While we love Nuzest, Just Natural for many reasons that we will list below, you can use whatever powder you like and on hand.
Here are just a few of the reasons we like Nuzest, Just Natural Powder:
- High in Plant-Based Protein, Low in carbohydrates and sugar
- Made with European Pea Protein which has all 9 essential amino acids
- It is pH balanced which helps alkaline the body
- High in Glutamine which is essential for muscle recovery
- Made with a water-based isolation process that removes lectins, so easy to digest and Paleo-friendly
- They employ strict growing conditions and rigorous testing and chemical-free processing
- Taste great!!
Now let’s make these homemade protein bars and give our family a snack that they will love and is good for them!
We hope you enjoy this recipe as much as we do – if so, we’d love it if you take a minute to write a review below or please tag us on Instagram, Twitter, Facebook when you make it. Now ready to make it yet? Then why not Pin it on Pinterest for later?!
If you are looking for other quick snacks, why not try our Maca Energy Bites, Low Sugar Strawberry-Raspberry Smoothie, or our Golden Latte Tumeric Energy Bites – all are delicious and great for you!
We are a proud new affiliate of Nuzest and we are so excited to extend the discount to you! Click HERE for 15% off your Nuzest purchase just be sure to use the code: SCNuzest. See the bottom of this page for more on affiliate purchases.
Print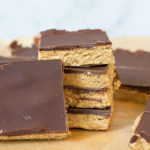
How To Make Delicious Homemade Protein Bars That Are Gluten-Free and Vegan
- Prep Time: 15 minutes
- Cook Time: 60 minutes
- Total Time: 75 minutes (most of the time is in the freezer)
- Yield: 14-16 1x
Description
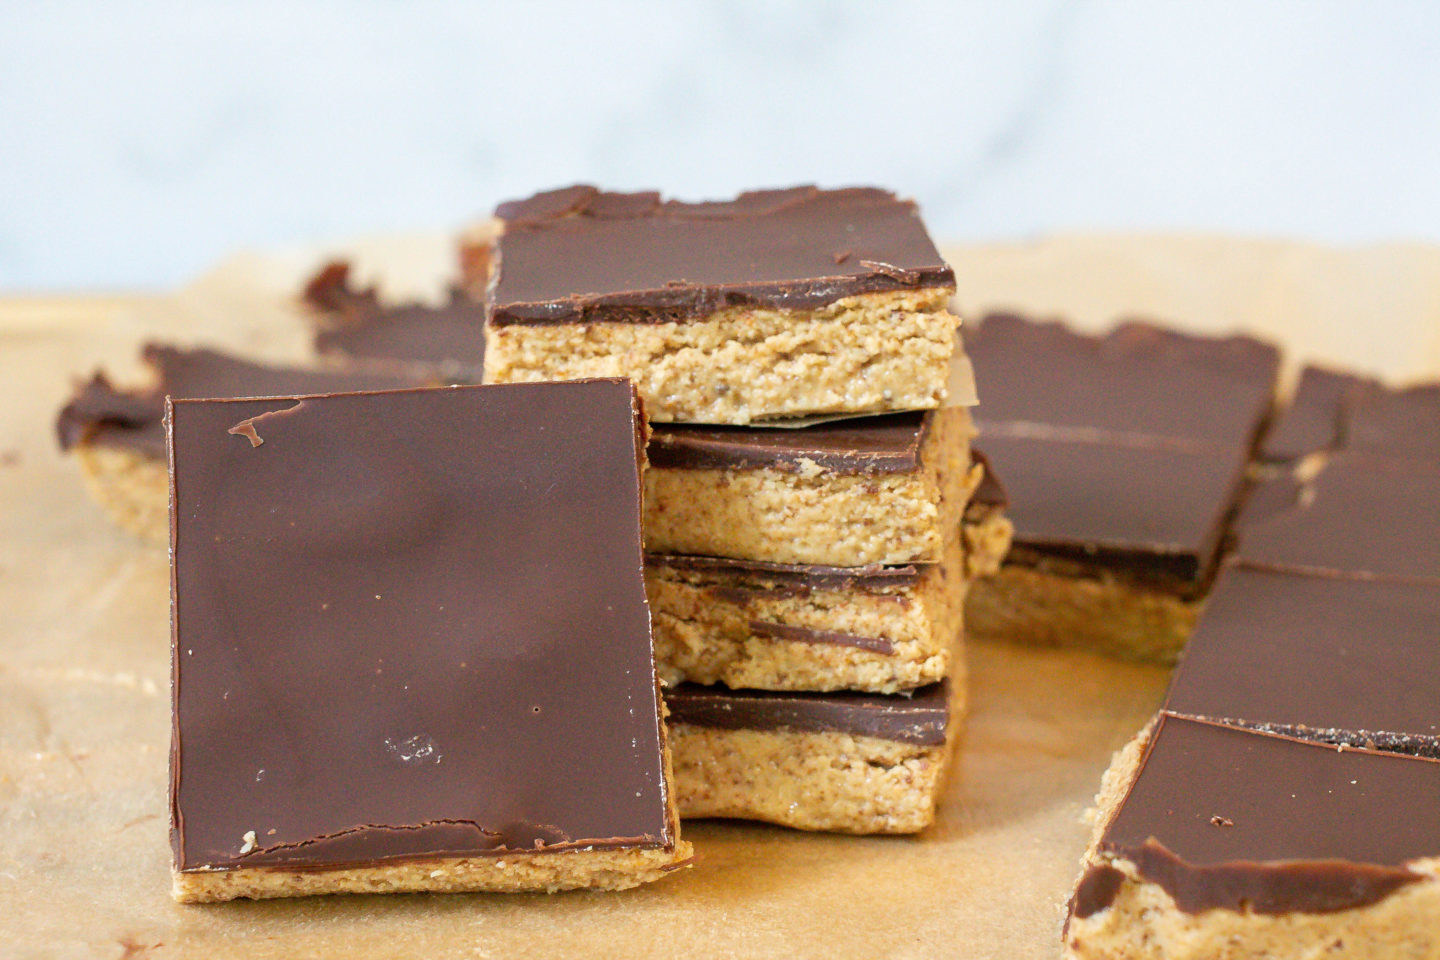
These homemade protein bars are SO delicious and are made with ingredients that you can pronounce, plus they are low in sugar, gluten and grain-free and vegan!
Ingredients
How to Make the Base Layer:
1 1/2 cup almond flour
1/2 cup Vegan Protein Powder, we used Nuzest
3 Tablespoons Coconut Flour
1/4 cup Coconut Sugar
1/2 teaspoon salt
1 teaspoon Cinnamon
3 Tablespoons Coconut Oil, melted and cooled a bit
3/4 cup nut or seed butter of your choice
How to Make the Chocolate Layer:
1/2 cup Dairy-Free Chocolate Chips
2 teaspoons Coconut Oil
Instructions
1.) To make the base layer, add the dry ingredients (almond flour, coconut flour and sugar, salt and cinnamon) to a medium-sized bowl and whisk together to remove any lumps.
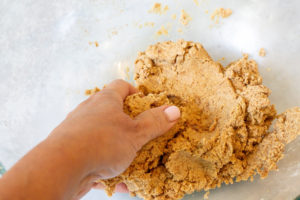
2.) Add the coconut oil and nut/seed butter and stir to bring together – this might be easier if you get in there with your hands to bring the dough together.
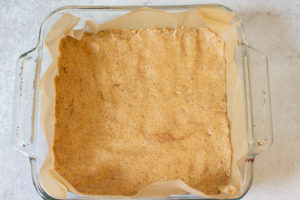
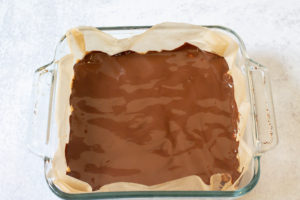
3.) In a 8″ x8″ pan lined with parchment paper, press the dough evenly into the bottom of the pan. Place in the freezer for about an hour to harden up.
4.) To make the chocolate layer, melt the chocolate and coconut oil in the microwave or double boiler. Stir until all the chips are melted and the mixture is pourable.
5.) Remove the dough from the freezer and spread the chocolate over the dough and place back in the freezer to harden.
6.) Once the chocolate has hardened, you can cut them up and enjoy! These are best kept in a tightly sealed container in the freezer and eaten straight from there.

